LogFX is very simple to use! But in case you're just getting started, or want to see what LogFX is capable of doing, this page is for you.
In this page, LogFX Menu operations are shown like this: File > Open File.
Keyboard Shortcuts look like this: Meta+O (where, Meta is usually Ctrl (Linux, Windows), Cmd on Mac).
Table of Contents
- Getting started
- Opening a file
- Viewing multiple files
- Changing the Font
- Show time gaps
- Tailing a file
- Go to a certain date-time
- Highlighting content
- Filtering content
- Copying content
- Grouping files and highlight rules into Projects
- The context menu
- The buttons menu
- Customizing LogFX with system properties
- Styling LogFX's appearance
Getting Started
The easiest way to get LogFX is via the self-contained installation, as it imposes basically no requirements on your system other than around 100MB of available RAM.
Simply go to the LogFX Releases page on GitHub and select which zip to download for your platform.
There are three options available:
- logfx-xxx.yyy-linux.zip (Linux)
- logfx-xxx.yyy-mac.zip (Mac)
- logfx-xxx.yyy-windows.zip (Windows)
Click on the appropriate version for your Operating System to download it, then unzip the file in some directory you can find it easily later on.
The zip contains a top-level directory called logfx/.
To start LogFX, run the bin/logfx file on Linux and Mac, or bin/logfx.bat on Windows,
within that directory.
LogFX can also be downloaded as small jar file. Open the section below for details:
Running LogFX from a Jar (for Java users)
For Java users, it may be nicer to manually download the tiny jar (around 300KB) and run it directly with
java -jar logfx-all.jar.
Get the jar with this command (change VERSION to the latest LogFX version):
VERSION="1.0" && curl https://repo1.maven.org/maven2/com/athaydes/logfx/logfx/$VERSION/logfx-$VERSION-all.jar -o logfx.jar
This works! But you must have Java 17+ with the JavaFX modules available by default.
An easy way to get an appropriate, free JVM which includes JavaFX, is to download a
JDK FX package from
Azul (Zulu Community), or Liberica JDK from BellSoft.
Both Azul and BellSoft make their JavaFX-friendly JVM distributions available on SDKMAN!.
Installing them with SDKMAN! is as easy as running sdk use java 17.0.2.fx-zulu on the terminal.
Another option is to use a standard JDK17+ distribution, and download the JavaFX modules separately from openjfx.io.
Opening a file
There are several ways to open a file in LogFX.
- In the initial screen, for example, you can drag-and-drop a file from anywhere.
- You can also use the menu item
File > Open File. - Finally, you can use the shortcut,
Meta+O.

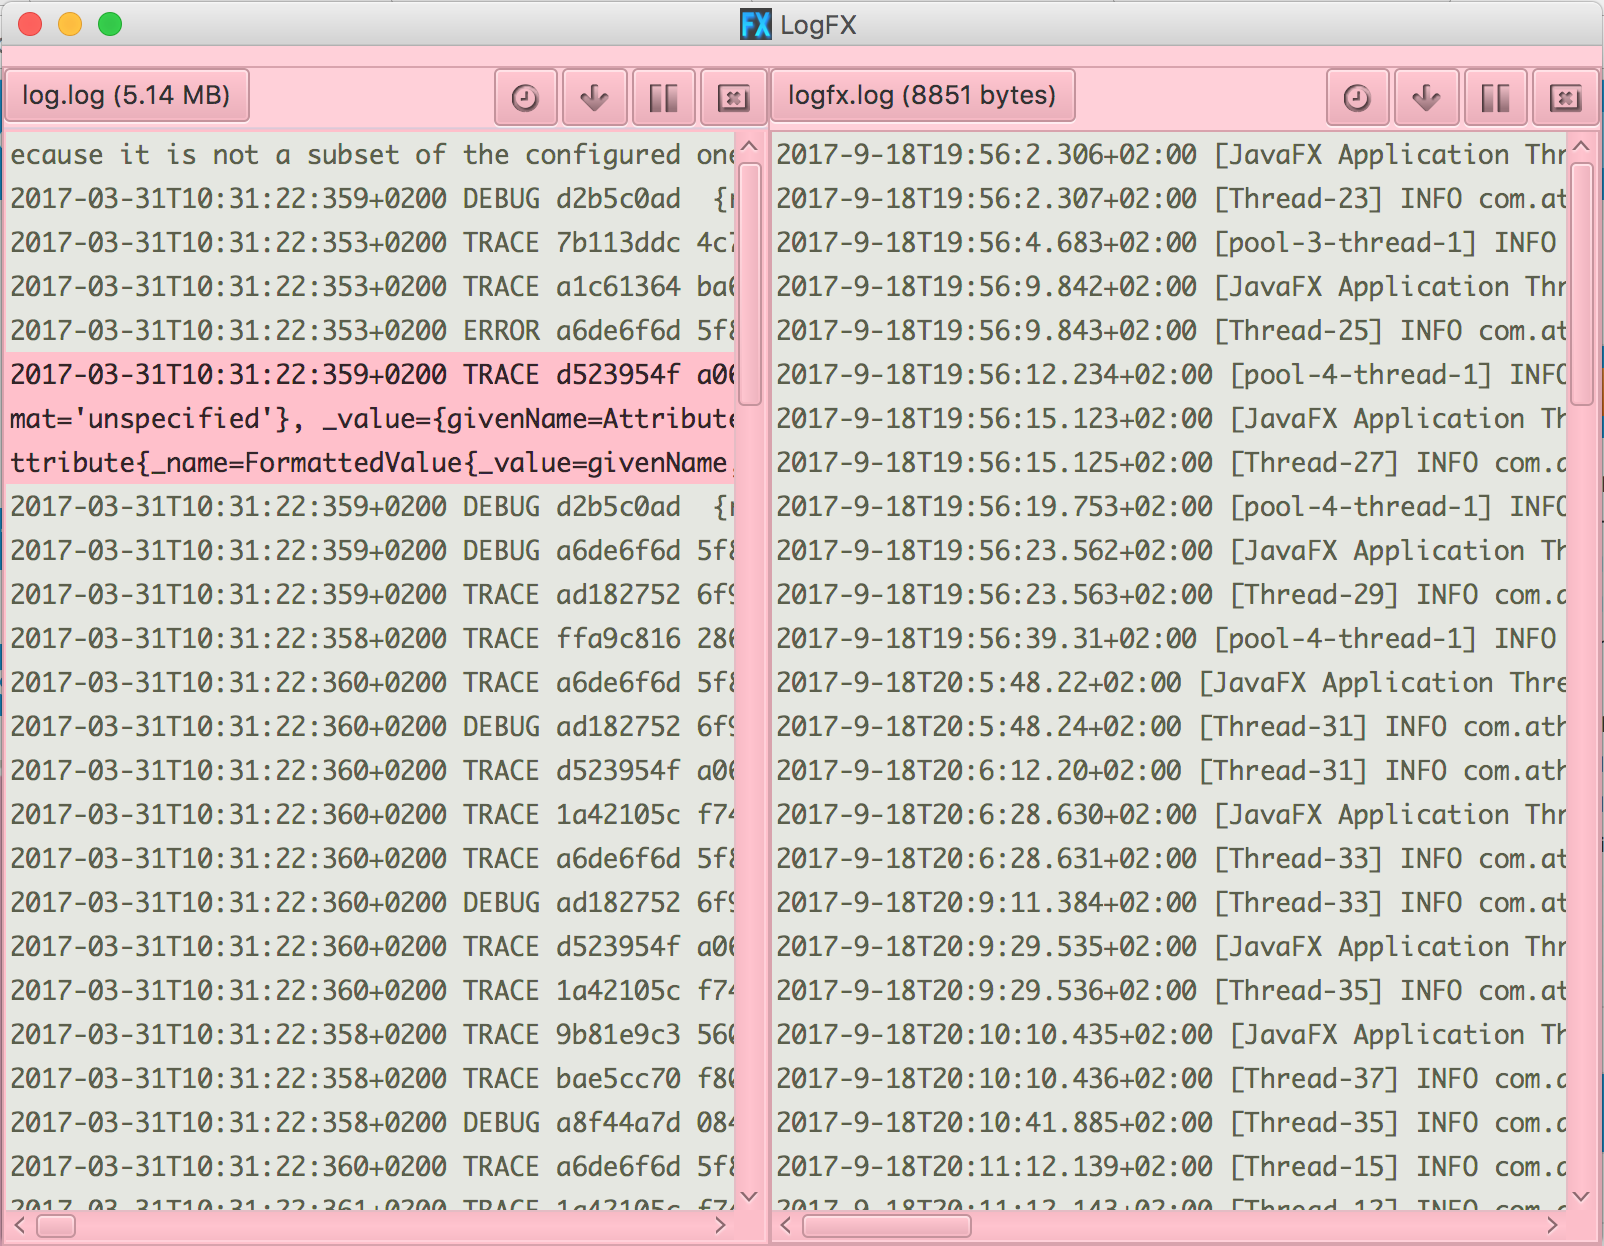
Viewing multiple files
Every time you open a new file, LogFX keeps the previous file(s) open, so you can see many files at the same time.
You can drag the border between different files to adjust how much space is given to each file.
It is also possible to switch the panes orientation. It is vertical by default (i.e. panes are shown side-by-side),
but you may switch to horizontal panes by clicking on the View > Switch Pane Orientation menu item.
The shortcut to do that is Meta+Shift+S.
Changing the Font
The font used to display all files can be changed via the View > Font menu, or
using the shortcut, Meta+Shift+F

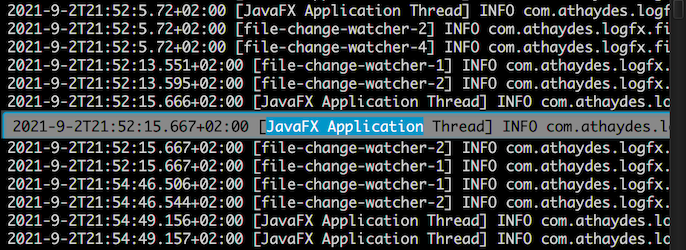
Show Time Gaps

To show time gaps between log lines, click on the above button, or use the shortcut Meta+K.
Tailing a file
To tail a file, i.e. follow the tail of the file as it is being written to, you can either
click on the button shown above, or use the shortcut, Meta+T.
To go to the top of the file, press Meta+Shift+T.
Go to a certain date-time
To open a certain date-time on an open file, you can either
click on the button shown above, or use the shortcut, Meta+G, then enter the date-time
you want.
This only works if LogFX can identify the date-time in at least a few log lines at the beginning of the file.
If your log file contains date-times but LogFX fails to identify them, try to add a custom DateTime Format.
All logs checkbox.
Highlighting content
Highlighting content is LogFX's speciality! It makes it very easy for content you're interested in to stand out.
To choose rules for highlighting content, open the Hihglighting Options popup by
going to the View > Highlight Options Menu, clicking on the above button,
or using the shortcut, Meta+H.
The last rule is always the same for all highlight groups (which we will see later) and determines the default look of all file contents. Changing the colors for this last rule should cause all files's contents to change color. Try that!
You can highlight content by creating a new rule with the regular expression for matching the content you are interested in. Every line matching that regular expression will be highlighted with the colors for the rule. The first rule that matches, in order, is used.
Highlight rule Groups
Because there are many different kinds of logs (e.g. request logs, app logs, event logs), LogFX lets you select a group of rules for
each file you open. To create a new group of highlighting rules, in the Highlight Options popup (shown in the
previous gif),
click on the + button and add a few rules, as required.
Back on the file pane, select the group for the currently selected file in the drop-down at the top (shown just
above
with the Default group selected).
Filtering content
Filtering is performed based on highlighting rules. Only the rules that are selected for filtering are used to filter content. Log lines matching rules that are not selected for filtering are NOT displayed.
To toggle filtering, use the shortcut Meta+F or use the Menu View > Enable/Disable filters.
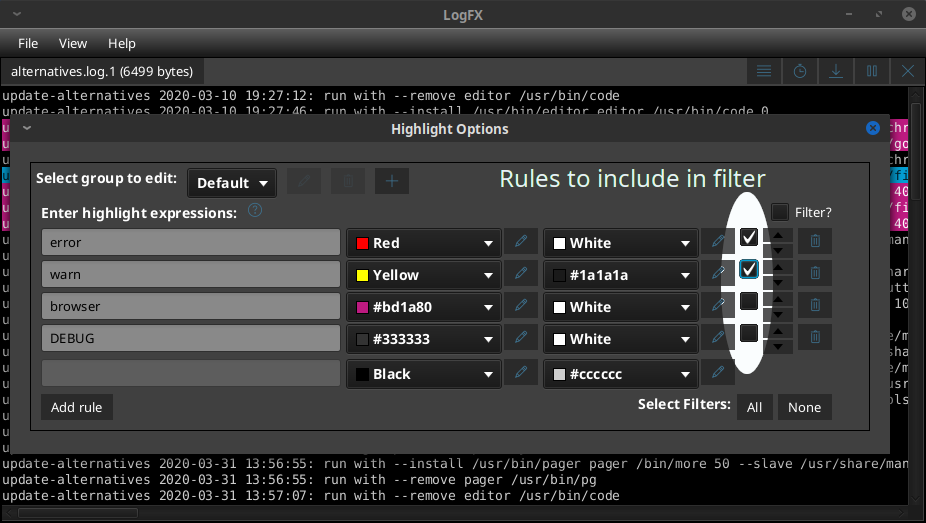
In the above image, only two of the four rules are selected for filtering, hence when you enable filtering (notice that there is also a checkbox
on the top-right of the brightened area that can be used to toggle filtering), only log lines matching these two
rules
(i.e. log lines containing the words error or warn) will be displayed.
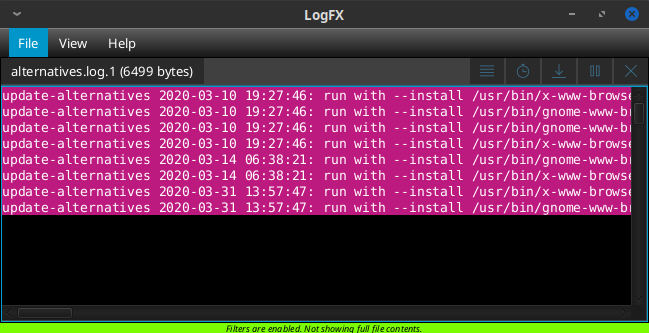
When filtering is enabled, a very prominent green bar at the bottom of the log file pane alerts of that fact, as shown below.
Copying content
To copy the contents of one or more lines on a log file, simply select the lines with the mouse, then press
Meta+C or right-click and select Copy Selection, as in most programs.
To navigate up and down, you can use the arrow keys, or Ctrl+N (next line) and Ctrl+P
(previous line).
The Meta+A shortcut, as you might expect, selects all visible log lines.
Double-click on a line to be able to select only a particular part of the text on a line. Notice that even though you may edit the text when you double-click, LogFX will never write back any changes to the log file (log files are immutable!).
Grouping files and highlight rules into Projects
When using LogFX, you'll often have a few logs open to track what's going on with your product. However, you might sometimes want to switch to work on another product with completely different logs and highlighting rules!
For this scenario, LogFX has Projects.
A Project is basically a container that includes:
- Log files currently opened
- Pane positions
- Highlighting rules and groups
- Font size
- Filters
In other words, all user interface aspects are stored separately in each Project.
The screen capture below shows how switching between different projects
(Meta+Shift+P or File > Manage Projects) is seamless:
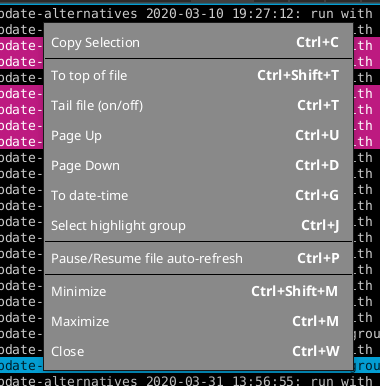
The context menu
To open the context menu, right-click on a log, enter Meta+E or go to the Menu
View > Show Context Menu.
This menu allows you to easily reach several actions, and reminds you of their shortcuts so you can more easily use common actions next time:
As with all other LogFX popups, you can close it by hitting Esc.
The buttons menu
Here is the complete buttons menu for each log file:
Customizing LogFX with system properties
The following system properties are supported:
logfx.home- home directory ($HOME/.logfxby default).logfx.stylesheet.file- custom stylesheet file (see next section).logfx.stylesheet.norefresh- set this to avoid LogFX refreshing the stylesheet on changes.logfx.log.target- where to send LogFX's own log (file|sysout|syserr).logfx.log.level- log level for LogFX's own log (trace|debug|info|warn|error).logfx.auto_update.check_period- minimum period, in milli-seconds, between auto-update checks.
To set system properties, set the VM_OPTIONS env var before calling the launcher script in the
bin/ directory and use Java system property
syntax (e.g. -Dlogfx.log.target=sysout).
Styling LogFX's appearance
Every aspect of LogFX, including the colors of buttons, menu bar, pane background etc., can be styled with JavaFX CSS.
Currently, the only way to do this, is to start LogFX with the system property logfx.stylesheet.file
set to the custom
CSS file. Changes to the CSS file are immediately applied to LogFX.
The default stylesheet can be found at src/main/resources/css/LogFX.css.
The most interesting element is the .root, which lets you set the theme-colour as well as the UI icons' colours:
.root {
    -fx-base: #1d1d1d;
    -icons-color: rgb(61, 114, 144);
}
You can also increase the padding between log lines, as another example:
.log-line {
    -fx-padding: 2, 5, 2, 5;
}
You can make LogFX look whatever way you like, regardless of your asthetics talents and good judgement: