
Learn Programming in Ceylon - Part 1
Introduction
Programming is one of the most rewarding activities there is. Once you master it, you will be able to create all sorts of things. Every single app, or program, you ever used on a computer was created mostly by computer programmers.
Every game you’ve ever played, every animation you’ve watched on the Internet, every website you’ve visited, required someone (or many people) to write computer instructions that specify in minute detail how everything should look, behave, change, react. It may look like an incredibly daunting task, and it is! But it is also one of the most fun tasks you can imagine! With only a computer, some free software and, most importantly, a good knowledge of programming, you can create anything that you are able to envision. There are no limits!
And the best thing is that not only is programming a lot of fun, learning it means you will have no trouble getting a job anytime soon. And with a pretty good paycheck too, just about anywhere on the planet.
This tutorial is mostly for people with little or no experience in programming. It may also be useful for experienced programmers who want to learn new concepts using one of the newest programming languages around - Ceylon.
Learning Ceylon is certainly a very good way to be introduced to programming because it contains, in a package that is much more consistent than most alternative languages, all features you would expect of a very modern language (Ceylon 1.0 was released in the end of 2013). By learning Ceylon, you will be able to easily understand and pick up many other similar programming languages.
But before we get started with writing code, a little bit of history to give some context.
A short history of programming languages
These days, very few people work on the processor-instructions level, which is done in a kind of language called Assembly.
That’s because to achieve anything much useful in Assembly would require enormous amounts of effort. Assembly was designed to map directly to machine instructions. Basically, it is a machine-friendly language, not a human-friendly one.
Luckily, people have created many higher level languages overtime that made it easier for humans to write code that can later be translated to Assembly by other programs, which can then be executed by computers. Programs that do the translation are called compilers or interpreters.
One of the first such higher level languages was Fortran, created in the early 1950’s. Many other languages followed, a few noticeable examples being LISP (1958), COBOL (1959), C (1969) and Prolog (1972).
In recent years, there has been an explosion on the number of programming languages freely available to anyone willing to learn them, some of which even “compile” to other languages! The number is almost certainly in the thousands, though it is hard to know how many languages are actually used by more than just a few people.
The big, dominant languages, on the other hand, are currently just a few: Java, C++, C#, Python, JavaScript, besides LISP (under a few varieties) are probably the main ones.
Newer languages incorporate lessons learned in previous generations of languages to make programming easier and more efficient. And a lot of lessons have been learned in the half-century people have been using higher level languages.
The newest generation of languages, which includes beautiful languages such as Haskell and D, are still coming up with innovations to attempt to improve on their predecessors and find the perfect balance between simplicity and expressivity, speed and conciseness.
To get the balance right is very difficult. But out of the newest wave of languages, one stands out for having an incredibly powerful and disciplined, yet simple and accessible character: the Ceylon programming language.
What is Ceylon
Ceylon is a direct descendant of Java, which is a language that has been battle-tested in all sorts of conditions (in small and very large applications) and despite its shortcomings, proven to be a great tool for developing almost any sort of application. Ceylon improves on Java’s foundations by keeping what’s good, removing what’s not so good, and adding some nice new concepts and lessons learned from many other languages, packaging everything into a highly concise unit which really makes programming a pleasurable experience.
Amongst the many goals of Ceylon, to achieve high readability and predictability are clearly the top ones. These are extremely important things in programming. When you read some code, you should be able to immediately know what it is trying to achieve, even if you are not familiar with all the details of the software. With Ceylon, that can be closer to reality than with just about any other language (but programmer’s diligence still accounts for most of the quality of the software, in Ceylon and in any other language).
Ceylon was designed from scratch to work in at least 2 different platforms:
- JVM (Java Virtual Machine) - the Java runtime.
- JavaScript engines - which includes basically every Internet browser and node.js.
This is really cool because it means you can write code that runs wherever you need it to run without changes!
To get started with Ceylon, the easiest way is to use the Ceylon IDE (Integrated Development Environment, or in plain English, the software you use to easily write and run Ceylon programs, which lots of nice features like auto-completion - it suggests to you what kinds of things you can do while you write something -, syntax highlighting and many other things).
Installing the Ceylon IDE
The first step to get the Ceylon IDE is to download Eclipse (Standard), which is the general system the Ceylon IDE is based on. Go to this page, choose the correct version for your system, then unzip the file you’ve downloaded into an easy to find directory, such as /programming/eclipse/.
Inside the eclipse folder, you will find the Eclipse executable. Double-click on it to start Eclipse (and add a shortcut to it on your desktop so you can find it easily next time!). Eclipse will suggest a workspace location the first time you open it. An Eclipse workspace is just a place for Eclipse to save your projects and other information it needs to work. Just accept the default (or choose any other location you want) and click OK.
Finally, you should see the Eclipse Welcome Page:
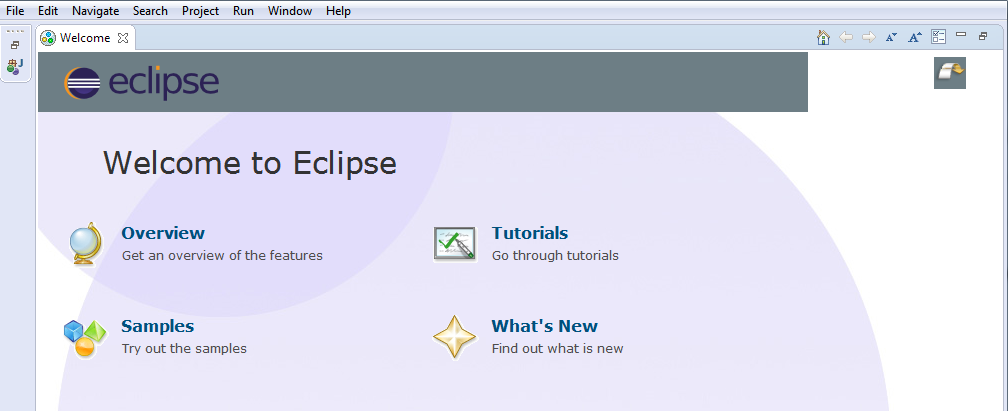
The overview and tutorials Eclipse comes with are targeted mostly at Java developers, but feel free to have a look at some of it if you have some time… but if you just want to get your hands dirty with Ceylon, just ignore those and keep reading!
To install the Ceylon plugin into Eclipse, follow these steps:
- In the top menu bar, click on the
Helpmenu item then selectInstall new software.... - In the
Work withfield, enter this URL:http://ceylon-lang.org/eclipse/updatesite/ - Click on the
Add...button. A popup will come up, but you can just hit OK again (you don’t need to give the site a name, just leave the Name field blank). - You should now select all options, as shown below, and click on OK.

- Click on
Nexta few times, accept the license agreement and finally hitFinish!
At this stage you might see a Warning message saying that this software contains unsigned content. That’s fine, you’ve just downloaded the files from ceylon-lang.org, so there’s nothing to fear, you can trust the good Ceylon people! Click on OK and continue with the installation.
- Click on OK to restart Eclipse.
If everything went ok, you should now see a nice elephant (the Ceylon mascot below. His name is Trompon!)
next to the Ceylon IDE button.
Click on this button and then on the New Project link. Give your project any name you want and follow the prompts.

And that’s it! We’re ready to start coding in Ceylon!
Creating a Ceylon module
To create a program using Ceylon, we must first create a Ceylon module. A module is the unit where all your program’s source files (where you will write your code) and other resources (such as images and configuration files) will be placed. A module can import, or use, other modules.
Some modules are written just to be used by other modules (ie. they can’t be used by non-programmers by themselves). They are called libraries. Other modules are intended to provide some functionality to general users (these often use many libraries). These are called applications (more recently people have shortened that to just apps, which sounds cooler, I guess). Here, we refer to both libraries and apps as programs, which is a more generic word.
To create a module using the IDE, click on File, select New and then Ceylon Module.
Enter a module name, such as hello.ceylon, and click on Finish.
A Ceylon module name, as specified in the Ceylon Language Specification,
is a period-separated list of lowercase identifiers (you may use lower-case letters and the symbol _ to separate words
if necessary). You may not use any Ceylon keyword as part of your module name (we’ll discuss keywords soon, but be
warned that module is one of the keywords, so you cannot call a module my.module, for example).
Because there are lots of Ceylon modules (and my bet is that there will be a lot more soon!), it is always a good idea to name your modules with names that are very likely to be unique… this avoids confusion and possible name clashes. A good way to do that is to follow the Java tradition (to name packages) of using a reversed domain followed by the actual name you want to give to your module… so, in my case, if I want to create a module called
commons, I would name itcom.athaydes.commonsinstead (I ownathaydes.com, but I let my brother use that so my site is on renato.athaydes.com.
Notice that every Ceylon module has a version! This is an awesome feature that Ceylon, unlike most languages, has built into the language itself and which makes Ceylon code highly modular. A module may use a library A with one version and another library which uses that same library A with a different version without conflict (no classpath hell in Ceylon). But that’s a little bit of an advanced topic for now!
You should now have a project with the following contents:
source/

    |--hello/ceylon/

                |--module.ceylon

                |--package.ceylon

                |--run.ceylon
The module descriptor can be used to document the module’s functionality, its version, and to import other modules.
module.ceylon
"This is our first Ceylon module!"
module hello.ceylon "1.0.0" {
    // import other modules here
}
You may write single line comments (any text whatsoever) after //. Anything after // is regarded as
a comment, which means it is not regarded as code by the compiler.
The code snippet above contains a comment (import other modules here).
Multi-line comments can be made between /* and */. Below is an example of a multi-line comment:
/* This is a multi-line comment

   anything written here will not be regarded as code and will not be executed!

*/
value notComment = true;
The text between double-quotes (This is our first Ceylon module) just above the module declaration is similar to a comment, but is used by Ceylon tools to provide documentation for program elements (in this case, the module itself). You can use markdown syntax to format text in these blocks.
Try changing the contents of module.ceylon to the text shown below, save the file then hover with the mouse over the module name!
"This is our first **Ceylon module**!

 ## A Header
 * item 1
 * item 2

 ## Other Header

 Ceylon is really cool!"
module hello.ceylon "1.0.0" {}
A module can have one or more packages. Each package can contain several elements such as functions, classes, objects and interfaces (we will look at each one of them in detail later on).
Packages are directories under (and including) the module directory and must have the same name as the directory.
In this example, our first package is called hello.ceylon. If we create a directory under hello/ceylon/ called
my_package, this directory will be the hello.ceylon.my_package package.
Each package may contain a package descriptor called package.ceylon. This file is used to document the package and to
make it shared, if desired.
If the package is shared, all elements defined in this package that are also shared will be visible in other modules
that import this module.
package.ceylon
"Package for our initial program."
shared package hello.ceylon;
Finally, you should also have a source file called run.ceylon inside the hello.ceylon package with the following contents:
run.ceylon
"Run the module `hello.ceylon`."
shared void run() {

}
This is where we are going to write the source code, which defines the actual functionality of our programs.
The name of the file does not matter much and you can have many source files in each package
(source files must have the .ceylon extension).
The initial function’s name, which for the above code is run, also does not matter, but it’s a Ceylon
convention to call the main function, ie. the function that starts your program, run.
A few words have now been introduced and deserve an explanation! First of all, a function is
just a piece of code which can be executed by either other functions or by the Ceylon runtime.
functions are one of the most important blocks from which you will create whole applications
(but not the only one, we will learn about many others later, such as class, interface etc).
As already mentioned, run is the name of the function… shared just means that this function
should be “visible” to elements that are located in different packages and, possibly, modules.
void means that the function does not return anything back to the caller. Other functions might return things, like a
Number, but let’s keep it simple for now!
Hello World!
We can make Ceylon write something out (print in programmer’s jargon) by changing the contents of run.ceylon to this:
"Run the module `hello.ceylon`."
shared void run() {
    print("Hello World!");
}
This is the famous Hello World program, which is almost always the first program you write when learning a programming language!
As you can see, it’s pretty simple in Ceylon! We invoke another function called print, which Ceylon provides to us, with
an argument "Hello World!". We must use quotes so that Ceylon understands that we want it to treat Hello World! as plain text, not some
kind of function call or anything else. We need to add a ; at the end to indicate that our statement is complete (like the . in
the end of this sentence). You could write more than one statement in one line:
print("Hello"); print("Hi there"); print("I said hi!");But this makes it harder to understand the code, so it is almost always better to have only one statement per line.
But now, let’s get to the real fun and run our first program!
Click on the green play button on the top of the screen. In the bottom pane called Console (should be near the bottom-right
of the screen), you should see the message we asked to be printed, Hello World!.
You can change the text in the String (text between quotes) to anything you like! Well, almost anything…
Ceylon allows you to include values, in a String. But to do that, we must first understand what a value is.
Types and values
Plain text like "Hello World!" is referred to as a String in the programming world (not only in Ceylon).
There are many other types, as these things are called, that you can use. For example:
Integer: integers such as-2, -1, 0, 1, 2, 3 .... Hexa-decimal numbers can also be represented:#FF05DA, which is16713178in decimal, and metric symbols can be used:10Kor10_000,2Mor2_000_000Float: floating-point numbers like-2.0, -1.95, 2.0, 12_345.678,1mor0.001,34uor0.000_034Boolean: either the valuetrueorfalse, one of the most useful types in any program!Char: characters (Unicode) like ` ‘a’, ‘b’, ‘A’, ‘z’, ‘\{#03C0}’ ` (the last of which is the beloved constantpi!)Null: a type with only one possible value,null(meaning the absence of any value, something that comes in handy quite often)
As you can see, type names always start with a capital-letter so that it’s easy to differentiate between a type and a value
identifier, which must always start with a lower-case letter or _.
Everything (values, objects, functions) has a type. The type of a value defines what can be done with that value. For example,
if you have a value whose type is Integer, you immediately know that you can:
- get its successor:
1.successor == 2 - get its predecessor:
10.predecessor == 9 - know whether it is a positive Integer:
(-3).positive == false - get a
Stringrepresentation of it:0.string == "0" - use mathematical operators on it:
2 + 2 == 4,4 ^ 2 == 16 - many other things! Type a number followed by a
.to see what else you can do with it.
You may notice that Integers and Floats contain several methods that are equivalent to mathematical operations, such as
plus,minus,divided,remainder,times… which are equivalent to+,-,/,%,*respectively. That’s because when you write2 + 2, Ceylon actually interprets this as2.plus(2), which you can also write if you prefer. Later we will see how this allows anyone to create types that can be used with those operators.
We can also define our own types, but we will have to learn a few more things before we do that!
The following code illustrates how we can declare a value called name with contents "John"
(in other words, a String of value "John"):
value name = "John";This is equivalent to writing String name = "John", but Ceylon already knows that "John" must be a String, so you
usually don’t need to tell it that (unless the value is declared at package-level, or outside any function)!
Value identifiers are case-sensitive, so
nameandnaMeare distinct identifiers.
value is a Ceylon keyword, and as such, you must not name something in your program value. There’s quite a few reserved
keywords in Ceylon, besides
module which we met earlier. Keywords are necessary for Ceylon to be able to interpret your programs… a few more
keywords are void, if, then, else, for, while and in, which are instructions we will get back to shortly…
If you really must name something with a keyword, you can scape it with
\i, for example:value \ivalue = "Hi".
Now, instead of just printing a fixed String, let’s make Ceylon print a String containing our value (paste the following
code inside the run function):
value name = "John";
print("Hello ``name``!");
If you run this program, you should see the message Hello John!! By wrapping name between back-quotes ``,
we made Ceylon interpret name as not plain text, but as an arbitrary Ceylon expression.
You may be asking yourself: but why not just write print("Hello John!");? and that would actually be exactly the same thing
for this basic example… but let’s now change our program slightly to ask the person running the program to enter a value,
then print Hello to the name given:
value name = process.readLine();
print("Hello ``name``!");
processis anobjectthat is always available in Ceylon… to see what other things it can do, just typeprocess.in the IDE and wait for the IDE to show you (hitting Ctrl+Space will bring a popup with suggestions from anywhere!).
Now, when you run this program, you will notice it will not print anything until you actually type something into the console window and hit Enter. But after you do that, you should see our greeting message printed with whatever value you entered.
This is really awesome, isn’t it?
Implementing a Maths Helper
How about a program that does maths for us?
That’s pretty simple, here are some examples:
value x = 2 + 2;
value y = 123 * 456;
print("x is ``x`` and y is ``y``");
Which prints:
x is 4 and y is 56088
You could even ask the user to enter numbers to use in the calculation:
process.write("Enter a number (x): ");
value userX = process.readLine();
value x = parseFloat(userX else "");
process.write("Enter a number (y): ");
value userY = process.readLine();
value y = parseFloat(userY else "");

if (exists x, exists y) {
    print("``x`` * ``y`` = ``x * y``");
} else {
    print("You must enter numbers!");
}
Most of the syntax used above will be explained in the next section. For now, it should be enough to know that when you ask the user for a number, the user may enter invalid input, so you must check that
xandyactuallyexistsbefore trying to use them in any operation.
The write method of process prints something to the console, just like print, but it does not create a new line
after printing (unlike print, which is really just short for process.writeLine).
If you run this program, then enter 3 for x and 5 for y, the program should print:
3.0 * 5.0 = 15.0
Neat! Now you will never have to do multiplication in your calculator again!
Actually you could have used many other mathematical operators: + (plus), - (minus), / (division),
% (remainder), ^ (exponential)… you can use Ceylon as a powerful calculator:
print(((2.5 * 3.0) ^ 2) + ((10_000 / 7) % 37));The if statement and boolean expressions
In the previous section, we made use of another Ceylon function, parseFloat, to turn the String the user entered with
the keyboard into a Float (ie. a floating-point number) so that we can actually multiply the numbers.
But notice that after we get values for x and y, there is an interesting new construct:
if (exists x, exists y) { ... } else { ... }What this does is: first it checks if x exists… that’s necessary because the user might have entered something that’s
not a number for x, in which case the function parseFloat would not have been able to return a Float number at all!
But if x exists, it then checks if y also exists… only if that’s the case, the code between the braces will be executed.
If either x or y did not exist (ie. could not be understood as a number), Ceylon will execute the code in the else
clause and print You must enter numbers!.
You might be thinking, if the function
parseFloatdoes not return aFloatwhen we type something likeNOT A NUMBER!!!as a value forx, what does it return??? The answer is the object callednull, of which you will hear a lot later! For now, it’s enough to say thatparseFloatgives us either aFloatornull, and because we cannot multiply something withnull, we must make sure that what we have is notnull(which is whatexistsdoes), which means it can only be aFloat.
You can try using if with any boolean expression (something that evaluates to either true or false).
A boolean expression usually contains one or more of the comparison or logical operators:
==: equals!=: not equals>: greater than>=: greater than or equal to<: less than<=: less than or equal to&&: logical AND||: logical OR!: logical NOT
If you don’t know much about logic, that’s fine. All you need to know for now is that an AND condition is true if and only if both operands are true. An OR condition is true if and only if one or more of its operands are true.
A few keyword operators (which will be explained in time), such as exists, nonempty, in and is can also be part
of a boolean expression.
Some examples will probably make much more sense than any explanation:
if (5 > 0) {
    print("Ceylon knows that 5 is greater than 0!");
}

value x = 10;
value y = 20;

if (x <= 0) {
    print("This will be printed if x is less than, or equal to 0");
} else if (x <= 5) {
    print("This is printed if x is between 1 and 5");
} else {
    print("This is printed if x is greater than 5");
}

if (10 < x <= 20) {
    print("x is greater than 10 and less than or equal to 20");
}

if (x > 10 && y > 10) {
    print("Both x and y are greater than 10");
}

if (4 == 4) {
    print("The '==' operator checks for equality... 4 is equal to 4!");
}

if (x == 5 || y == 5) {
    print("x or y is 5, maybe both...");
}

Boolean veryLargeX = x > 1k;

if (!veryLargeX) {
    print("X is not that large");
}
You can use if statements to initialize a value with different contents depending on a number of conditions:
value x = 10;

// description could have different values
String description;

if (x > 10k) {
    description = "Very large";
} else if (x > 1k) {
    description = "Quite large";
} else {
    description = "Smallish";
}

print("x is ``description``");
In cases like this, you must make sure the value is definitely initialized before attempting to use it.
Working with functions
We have already defined function as a piece of code which can be executed by either other functions or by the Ceylon
runtime.
But what was missing from that definition is that functions are also values, which means they can be arguments to other
functions, or be the value returned by them, for example.
Check this out!
// a little helper function
Float? askUserForNumber(String question) {
    process.write(question);
    value userX = process.readLine();
    return parseFloat(userX);
}

shared void run() {
    // shorthand notation for functions
    function multiply(Float a, Float b) => a * b;
    function add(Float a, Float b) => a + b;
    void printResult(Float(Float, Float) operation, Float x, Float y) =>
        print("Result: ``operation(x, y)``");

    value multiplication = 0;
    value addition = 1;
    value option = askUserForNumber("Enter ``multiplication`` for multiplication, ``addition`` for addition: ");
    value x = askUserForNumber("Enter x: ");
    value y = askUserForNumber("Enter y: ");

    // assert we got valid input. If not, an error is thrown so the program can not continue!
    assert(is Float option, is Float x, is Float y,
            option == multiplication || option == addition);

    value operation = option == multiplication then multiply else add;
    printResult(operation, x, y);
}
First, we define a simple function that just asks the user for a number. As it is a top-level function (ie. not nested
inside another function), we must declare its return type (which is the same as parseFloat’s return type).
Now, inside the run function, we defined two new functions, multiply and add, using the short notation for functions
with the fat arrow =>.
This kind of function can only contain one expression. This is a very common style in Ceylon because usually functions
are broken up into many smaller functions until they become a simple expression. In fact, a function defined in this way
does not even need to have a name. If you just need to pass a function as an argument to another function, but you don’t
need to use it anywhere else, you can declare the function without a name as you invoke the other function, as in this
example:
printResult((Float x, Float y) => x * y, 10.0, 3.0);This kind of function that does not have a name is called an anonymous function. It can also be called a lambda, as the idea has its roots in the lambda calculus.
The long notation for functions is to
use { ... } to wrap all statements the function should execute (like we did for the askUserForNumber and run functions).
Back to our little program above… we then defined a function called printResult which takes another function,
called operation, with a type Float(Float, Float).
You might have guessed that this type corresponds to any function that takes two Floats as arguments
and returns another Float. Not coincidentally, both add and multiply are examples of just such functions.
A function that returns a String and takes only one Float as an argument would be a function of type String(Float).
The program then asks the user to enter either 0 for multiplication or 1 for addition, after which it asks for the
values of x and y.
In the next step, it asserts that the user entered valid values!
assert can be used for 2 reasons:
- to verify a condition is true and in case it’s not, throw an Error. When an Error is thrown, the program does not continue
execution (but there is a mechanism called
try/catchwhich allows us to handle Errors such as this). - to narrow the type of a value in conjunction with the
isoperator. After lineassert(is Float x);, it is guaranteed thatxis aFloat.
Finally, we call printResult using the appropriate operation.
Below are some sample runs of the above program:
Enter 0 for multiplication, 1 for addition: 0
Enter x: 10
Enter y: 3
Result: 30.0
Enter 0 for multiplication, 1 for addition: 1
Enter x: 4
Enter y: 7
Result: 11.0
Enter 0 for multiplication, 1 for addition: 2
Enter x: 10
Enter y: 5
ceylon run: Assertion failed
unviolated is Float option
unviolated is Float x
unviolated is Float y
violated option == multiplication || option == addition
The error message in the last run states that the option assertion was violated because option was not multiplication nor addition.
It is considered good practice to keep each function you write (including the run function) at most a dozen or so lines long.
The resulting program may be a little longer than if you just wrote a single, long function, but writing code like this has several benefits:
- every function you write can be re-used in many places (make it
sharedif you want to maximize re-usability - at the cost of flexibility, as it gets harder and harder to change functions once they are used in more and more places). - you only need to keep a small amount of information in your head when you are trying to understand what the code does because each function is small.
- each functionality is isolated from others and explicitly declares what is relevant information (its arguments) for it to do its job, and what is gives back (the return type).
If the name of the function is not enough for us to understand what it does, well, it probably has a bad name in the first place… but we should also look at the type signature of a function, which is made up by the types of the arguments (what we pass in) and the type of the return value (what we get out), when we need to find out the purpose of a function. This is valuable information!
One last consideration about functions is that they can have default values for their parameters. This is useful because sometimes you will notice that many invocations of a certain function use the same value for one, or several, of its arguments. Other times it’s just convenient to allow a different number of arguments to be provided.
To see how that works, let’s improve the multiply and add functions we defined earlier to allow callers to pass only one argument
in, rather than demand two. The neutral number for multiplication is 1.0 (any x multiplied by 1 is just x),
and the neutral number for addition is 0.0, so let’s use these as our defaults:
function multiply(Float a, Float b = 1.0) => a * b;
function add(Float a, Float b = 0.0) => a + b;
We can now call these functions using one or two arguments:
assert(multiply(2.0) == 2.0);
assert(multiply(2.0, 2.0) == 4.0);
assert(add(5.0) == 5.0);
assert(add(1.0, 1.0) == 2.0);
A function can have any number of optional parameters (ie. parameters with default values), including all of its parameters. The only limitation is that there can be no non-optional parameter after an optional one (this avoids any confusion that could arise matching parameters with their actual values).
An optional parameter of type
Floathas the typeFloat=. For this reason, the type of bothmultiplyandaddchanged fromFloat(Float, Float)toFloat(Float, Float=)after we made the second argument optional.
Are you able to modify the maths helper program using the your newly acquired knowledge of optional parameters to make it possible for the user to provide not only exactly 2 values, but between 1 and 3 values?
Give that a try!
After you’re done, compare your solution with this one and see what you could have done differently!
Blocks and scope
Values are always scoped inside blocks in Ceylon. A block is usually enclosed in curly braces. Examples of things that
have blocks are functions, if and else branches, and others things like classes, that we will meet later.
Blocks can be nested, meaning that you can declare blocks within blocks. A nested block has access to any values declared in the enclosing block(s), but values declared in a block cannot be “seen”, or accessed, outside of that block.
For example:
value top = "hi";

if (top == "hi") {
    // inIf is not visible outside this if branch
    value inIf = true;

    // can see top from here
    value topCopy = top;
} else {
    // cannot see inIf from here
    value inElse = true;

    // can see top from here as well
    value topCopy2 = top;
}

// name is only visible within the function block
function topLevel(String name) {
    // char can only be seen within nameChain's block
    function nameChain(Character char) {
        // name can be seen in nested block
        return name.characters.chain { char };
    }
    return name.map(nameChain);
}

// cannot see anything declared inside the blocks above
value a = top; // OK
value b = topLevel; // OK (reference to the function)

value c = inIf; // ERROR
value d = inElse; // ERROR
value e = name; // ERROR
value f = nameChain; // ERROR
Scoping values makes it much easier to reason about code as you don’t need to keep track of all values ever declared anywhere to make sense of the code. Usually you can focus only on the block you’re looking at and at the enclosing blocks (that’s one of the reason nested blocks are best kept at a minimum).
A nested block’s value can “cover” a value declared in an enclosing block:
String topLevel(String name) {
    Boolean nested(Boolean name) {
        // here, name is a Boolean
        return !name;
    }

    // here, name is a String
    String other = name.uppercased;
    return nested(name.empty) then other else name;
}
The rule used to determine which value you can see in cases like this is very simple: the visible value will be the closest one to the expression where you use it.
In the above example, the Boolean name is closer than the String name to any expression which is inside the
nested function block.
It should be clear that using the same name for values that represent different things is a bad idea. However, in large, complex code bases with lots of values in the higher scopes, that may be hard to avoid - another reason to keep nesting to a minimum.
Also, make sure you declare your values in the most restricted scope possible to minimize such issues.
Representing and using lists
Our maths program is starting to become somewhat useful. But it’s still quite limited. For example, it only takes two numbers as input. What if we wanted to be able to allow the user to enter any number of inputs to perform more complex operations?
We must have a way to represent a list, or sequence of values, not only single values. You can declare and use a list using the following syntax:
value sequence = [1,2,3];
assert(sequence.first == 1);
assert(sequence[0] == 1);
assert(sequence[1] == 2);
assert(sequence[2] == 3);

// does not compile, item at index 3 does not exist!
assert(sequence[3] == 0);
If you try the example above, that does not compile, in the IDE you will notice that the code that has an error will be underlined with a curly, red line. When you see that, you know you have a compilation error, which means your program does not compile and therefore cannot be run. Hovering over the error with your mouse will give you the reason why the code does not compile (in this case, it will say “operand expression must be of type Object: Null is not assignable to Object”). These messages are usually very specific and make it easy for us to fix the error, but to understand them properly you’d often need a little bit more knowledge than you have gained so far. But don’t worry, keep reading and soon this kind of error message will make perfect sense!
In the above example, the type of sequence is [Integer, Integer, Integer], which means a Tuple of 3 Integers.
The following example shows how the element types are preserved when we take them from a Tuple:
value x = ["Hi", 1, true];
String x0 = x[0];
Integer x1 = x[1];
Boolean x2 = x[2];
Tuples are extremely powerful! Read more about them in the Tour of Ceylon.
An empty list has type Empty, which is synonym with [], so you can write [] emptyList = [];.
A list with one or more elements is an instance of [Element+], where Element
is a type-parameter, ie. it can be replaced with any actual type.
For example, [0, 1] is an instance of [Integer+]. ["Hi"] is an instance of [String+].
A possibly empty list is an instance of [Element*], or equivalently, Element[], where Element could be any actual type.
The following examples should clarify things:
// tuple
[Integer, Integer, Integer] s1 = [1,2,3];

[Integer+] s2 = [1, 2, 3];

// the following 2 type declarations are equivalent (maybe-empty list)
Integer[] s3 = [1, 2, 3];
[Integer*] s4 = [1, 2, 3];

// this is fine
[Integer*] s5 = [];

// this will not compile!
[Integer+] s6 = [];
The operator nonempty may be used to narrow the type of a list from [Element*] to [Element+]:
[Integer*] sequence = [1, 2];
if (nonempty sequence) {
    // this would not compile outside the if block as sequence.first could be null
    print("First element is ``sequence.first``");
}
An alternative way to represent lists uses curly braces rather than square-brackets, as in {Integer+} list = {1, 2};.
These are called Iterable, while the ones that use square-brackets are called Sequential.
They behave much the same way, except that Iterables might be evaluated lazily (see explanation below) and do not
necessarily provide the same elements when iterated more than once, and Sequential offers more methods and properties,
besides providing always the same elements.
Being lazily evaluated means being evaluated only when required, rather than at declaration time, where possible. For example, the
Range(which we will meet just below) from one to one-million can be declared as1..1M, and luckily it will be only lazily evaluated, so unless you actually use all of its values, Ceylon will avoid the hard work of creating a Range one-million items long (like any lazy person would!) and will only evaluate items as needed.
Roughly anywhere an Iterable is required, you can use a Sequential, but not the other way around. This is because
Sequential is a subtype of Iterable (we will see more about this in Part 2).
If you have two Iterables which you want to treat as a single one, you can use the chain method to chain one Iterable
to the other, giving a single Iterable:
value a = [1, 2, 3];
value b = [10, 11];
value ab = a.chain(b);
assert(ab.sequence == [1, 2, 3, 10, 11]);
Notice that in the example above, the chain method returns an Iterable which is converted to a Sequence, using the
sequencemethod, before we compare it to the expected value. That’s necessary because Iterable, being a lazily-evaluated structure, does not guarantee stability of its elements, so comparing Iterables is generally a bad idea. If you need to ensure stability of items on more than one iteration or need to compare Iterables with something else, always convert it to a Sequence first.
A special kind of Sequence is Range. A range can be expressed as follows:
value zeroToTen = 0..10;
assert(zeroToTen == [0, 1, 2, 3, 4, 5, 6, 7, 8, 9, 10]);
value lowerCaseCharacters = 'a'..'z';
value firstFiveUpperCaseLetters = 'A':5;
Anything that is Ordinal (ie. have a natural ordering, like Integers and Characters) can be put into a Range.
A really interesting thing you can use Ranges for is to extract just parts of other lists:
value list = [1, 2, 3, 4, 5, 6, 7, 8, 9, 10];
value firstFiveElements = list[0:5];
value thirdToEigthElements = list[2..7]; // indexes start from 0, so the 3rd element has index 2
For details about Iterable, Sequential and Range, visit the Tour of Ceylon.
Loops and for-comprehensions
Now that we know how to create lists, we can iterate over them to do something with each item using the for statement:
value internationalGreetings = ["Hi", "Ola", "Hej", "Privyet", "Salut"];
for (greeting in internationalGreetings) {
    print(greeting);
}
This will print each international greeting in turn.
A
Stringis a[Character*]in Ceylon, so you can also iterate over each character of it! For example:for (letter in "My Text") { /* do something with each character */ }
Another way to iterate over elements of a list and do something with them is to use a comprehension.
Comprehensions also use the for keyword, but unlike the for statement we used above, a comprehension evaluates to a value:
value sizeOfGreetings = { for (greeting in internationalGreetings) greeting.size };
print(sizeOfGreetings);
Running this program prints:
{ 2, 3, 3, 7, 5 }
This is usually referred to as mapping (from Strings to sizes). In fact, the above is equivalent to using the map
method, which takes a function (in this case, the method size of String) and applies it over each item of the list,
returning the resulting mapped values:
value sizeOfGreetings = internationalGreetings.map(String.size);A related method, which we will need later to complete our maths program, is fold.
Whereas map applies a function to each item in the list, fold uses a function to collapse the list into a single value
by accumulating the result of applying the function to each element in sequence.
To do that, it requires an initial value, besides the function to be applied. We can use that to, for example, multiply
all items in a list (the initial value we give is 1.0 because it is the neutral value for multiplications):
function multiplyAll(Float* numbers) =>
      numbers.fold(1.0, (Float partial, Float elem) => partial * elem);

// this prints 100.0
print(multiplyAll(2.0, 5.0, 10.0));
Comprehensions can also be used to eliminate some items from a list, keeping only the ones we are interested in (in other words, filter):
value greetingsStartingWithH = { for (greeting in internationalGreetings)
                                 if (greeting.startsWith("H")) greeting };
print(greetingsStartingWithH);
Which prints:
{ Hi, Hej }
The same can also be achieved with the filter method:
value greetingsStartingWithH = internationalGreetings.filter((String s) => s.startsWith("H"));Awesome or what?
Besides for, there is another way of looping called while. You can use while when you want to loop as long as some
condition holds true.
A basic use of while would be to allow the user to run a program again and again without having to re-start it:
String askUser(String question) {
    process.write(question);
    return process.readLine();
}

while(askUser("Do you want to continue?").lowercased in ["y", "yes"]) {
    // continue program
}
Variadic parameters
Variadic parameters allow a function to take any number of arguments. For example:
void printStrings(String+ strings) {
    for (string in strings) {
        print(string);
    }
}

printStrings("Apple", "Orange", "Pineapple");
printStrings("Hi");

// does not compile, must provide at least one String
printStrings();
To allow empty lists, use String* instead of String+.
You can pass an Iterable to a function that has variadic parameters by using the spread operator (*):
value list = ["White", "Blue", "Red", "Black"];
printStrings(*list);
A variadic parameter must always be the last parameter of a function. The following are valid functions:
function myFunction(Integer a, String* b) { ... }
function otherFunction(Boolean a, Integer b, Float+ c) { ... }
// a function which takes at least 3 Booleans
function oneMoreFunction(Boolean a, Boolean b, Boolean+ c) { ... }
Enough of theory… now we are ready to write some cool stuff!
Improving the Maths Helper
Let’s get back to our Maths Helper program… we have enough knowledge now to extend it so that we can let the user enter as many operands as he or she wishes. We can also let the user choose to re-run the program again and again without re-starting it.
With these requirements in hand, we are ready to start coding!
Below is a possible solution to this problem. Before you look at it, you should definitely try to write it yourself.
You can re-use all the useful functions we have already defined above, like askUserForNumber, multiply, add…
If you get stuck, you may have a look at the solution below to see how it solves the problem you’re having. But notice that
this solution is by no means the only solution! You can certainly have a different solution that works just as well and
even better!
String askUser(String question) {
    process.write(question);
    return process.readLine();
}

Float? askUserForNumber(String question) => parseFloat(askUser(question));

{Float*} askUserForNumbers(String question, {Float*} previousAnswers) {
    value answer = askUserForNumber(question);
    if (exists answer) {
        return askUserForNumbers(question, previousAnswers.chain { answer });
    } else {
        return previousAnswers;
    }
}

void runMathsProgram() {
    function multiplyAll(Float* numbers) =>
        numbers.fold(1.0, (Float x, Float y) => x * y);
    function addAll(Float* numbers) =>
        numbers.fold(0.0, (Float x, Float y) => x + y);
    void printResult(Float(Float*) operation, Float* numbers) =>
        print("Result: ``operation(*numbers)``");

    value multiplication = 0;
    value addition = 1;

    value option = askUserForNumber("Enter: * ``multiplication`` for multiplication,
                                            * ``addition`` for addition: ");
    if (exists option, option == multiplication || option == addition) {
        value numbers = askUserForNumbers("Enter a number (or just Enter to continue): ", {});
        printResult(option == multiplication then multiplyAll else addAll, *numbers);
    } else {
        print("Invalid option");
    }
}

"Run the Maths helper program."
shared void run() {
    value stars = "*".repeat(10);
    print(stars + " Welcome to the Maths helper " + stars);
    runMathsProgram();
    while(askUser("Do you want to start again? [yes/no]: ").lowercased in ["y", "yes"]) {
        runMathsProgram();
    }
    print("Bye!");
}
The example above uses the
+operator to concatenate Strings. Because Ceylon supports String interpolation, this is not used very often, but it is good to know that you can do it because many programmers write code like this (especially Java developers, because that’s the only way to do this in Java).
Some general software development remarks
A lot of things can still be much improved in this program. For example, we could support many more operations. Or we could provide more meaningful error messages when the user enters invalid input.
In business terms, the initial goal when developing a new product is to release a MVP (Minimum Viable Product). The above
program would be more like a 0.1-beta version of our product. With each improvement that you make or feature that you add,
you get closer to creating a program that people might actually be interested in using (the 1.0.0 version).
But no program is ever complete. There’s always something that can be made better, or bugs to be fixed once the program gets a little more complex, or things that can be removed because they no longer make sense. That’s why programs always have version numbers. It is an acknowledgement that software development is an iterative process.
You create something small and simple at first, then gradually build more and more on top of it.
It is just like learning code.
You will never know everything there is to know, and given the relatively young age or the software development profession, nobody really knows what is the best way to create software yet. And this is what makes programming so exciting! We’re still figuring out most of it, and every new programmer can help finding better and smarter ways to code.
Final remarks
Good work in getting this far! I hope you enjoyed this first part and were able to follow most of it without feeling too bored or confused.
If you didn’t fully understood some concept, write code to experiment with it. All experienced programmers agree that the best way to learn code is to write code. So get your hands dirty and write as much code as you can.
There will be times when you will get frustrated because something doesn’t work. This is natural and is an absolute integral part of programming. As you get more experienced, you will still get stuck sometimes, but on harder and harder problems. But there are many ways to get over issues.
The first one should always be to think hard about what is going wrong. Usually you get stuck because one of your assumptions about the code is not quite right. Test your assumptions by writing simple snippets of code that verify them.
The second thing you should try is have a look at the Tour of Ceylon. Even though its language is quite advanced (it is mostly aimed at Java developers), there is lots of examples and in-depth explanations which are probably going to go a long way towards helping you figure out things.
If all your assumptions are correct, the Tour did not help much and still your code does not work, feel free to post a question on the Ceylon discussion group! There’s lots of people there who will be really happy to help. No question is a stupid question. All of us who write code probably had the same troubles you’re likely to get into, so we know exactly how it feels and best of all, how to get over them!
Google is also your friend, though because Ceylon is such a young language, you may not find much outside of the official documentation (as of 2014 at least).
Where to now?
I hope that this tutorial has made you excited about the possibilities of writing code with Ceylon. A lot of things have been covered: types, values, functions, lists, conditionals, loops, comprehensions! But there still is many more to learn: custom/union types, interfaces, alias, objects, mutability, polymorphism, enumerated types, parameterized types, importing modules, using third-party libraries, and so much more.
Many of these are the subject of Part 2 of this tutorial.
That’s it for now! Let me know that you enjoyed this tutorial by starring this repo! The more stars I get, the more motivation I will have to keep writing and covering the more advanced (and fun) features of Ceylon.
Happy coding!